


Thinking Outside the Box Stall: Building a Long-Term Temporary Barn, Part 1
Meagan DeLisle got a dream opportunity with a unique challenge: creating a temporary yet safe barn and pasture plan so she could bring her horses home to rented property!
For two years my horses have lived at a full care boarding facility an hour away. Countless fast food dinners, multiple nights arriving at home past dark, several thousands of miles on my car later and I knew it was time for a change. In my opinion, the best part about owning a horse is the close personal connection you establish when you are the one providing all of their care. Call me crazy, but I love late nights at the barn mixing feed and mucking stalls.
It has always been my dream to have my horses in my front yard, but as my husband Wayne and I are currently renting it didn’t seem feasible. Sometimes, however, the stars align just right, and everything falls into place in a way that you know it was fate. While talking with my landlord (who is a close personal friend and whose father-in-law is an avid horseman) about the cost of board and how challenging it was for me to spend ample time with my horses because of the drive, he stopped me mid-sentence.
“Why are you paying board when you can keep your horses here?”
My house is out in the middle of nowhere surrounded by 300 hundred beautiful acres of my landlord’s farmland and the next thing I knew we were shaking hands on an agreement for me to rent five acres literally 500 feet from my front door. In a ten-minute conversation, my dream came true and Wayne and I had a TON of planning to do. Not only were we operating on a budget, but everything we did had to be temporary so that when we decided to move, we could pack it all up with us.
The Land
Four of our five acres is former farmland that was planted in soybeans last year and left to winter after harvest. The other acre is mostly wooded with one clear spot where I decided to settle our shelter. We knew our work was going to be cut out for us creating a sustainable pasture for the horses to graze.
Three sides of our fence row were already fenced; however, it was strung up with barbed wire. With permission from our landlord, we took down the barbed wire and hung up three strands of 1.5-inch electrical tape. We placed t-posts down the long side that was not fenced and also sectioned off the rectangular acre that is mostly wooded as the sacrifice lot. In addition, we sectioned off a small area in front of what would be our shelter to use as a dry lot for if the fields were too muddy for turnout.
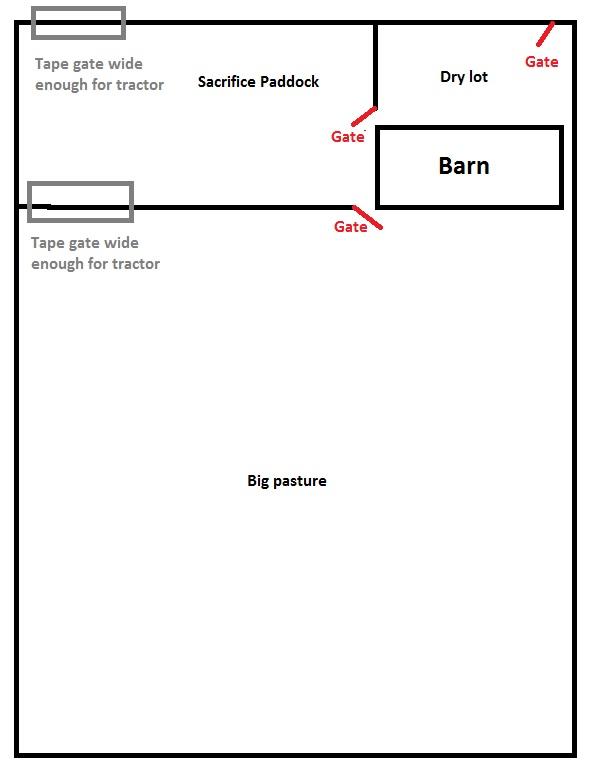
Check out my mad design skills on Microsoft Paint.
This plan came into play last fall so we quickly began researching grass mixes to plant that would winter well and come up in the spring. Our local seed and feed had a horse seed mix that was made up of five horse-friendly kinds of grass that worked perfectly. Knowing I was going to have to overseed to create a sustainable population, I purchased four fifty pound bags.
We don’t get super fancy over here at what I now call DeLisle Sporthorses (I think it makes me sound fancy, but in reality it’s just my horses and me hanging out taking too many selfies) so we got the seed spread in the most redneck way possible: I drove the farm truck through the field while my cousin sat on the tailgate with a hand spreader.
This spring, we sprayed the weeds in the pasture and later mowed them down to allow the grass to come up. In addition, we planted an extra 20 pounds of Bermuda grass to try and supplement our crop. The field looks decent so far, but will need lots of rest to sustain my herd of four (many of you know about my two OTTBs, but if you haven’t read about my two newest additions you can find out all about them HERE). I have researched pasture management out the wazoo and have a plan set up to rotate the horses on and off the field to hopefully help it hang in there throughout this year.
The Barn
The most significant issue was finding a shelter option that would fit my needs and be portable. Most people would toss up a run-in shed and call it a day (which we are doing for the draft girls as they don’t fit in my stalls!) but my other horses show in the winter and get full body clips so I wanted to be sure they would be out of the weather in the winter months.
I looked into TONS of options: portable run-in sheds with dutch doors (too expensive with shipping to my remote location), Morton metal buildings (have to be set on a permanent foundation), and carports (wound up being out of budget when you factored in all the upgrades we needed for it to be a functional horse barn). I was pretty frustrated with my options when Wayne stumbled onto this bad boy at a dealer’s lot.
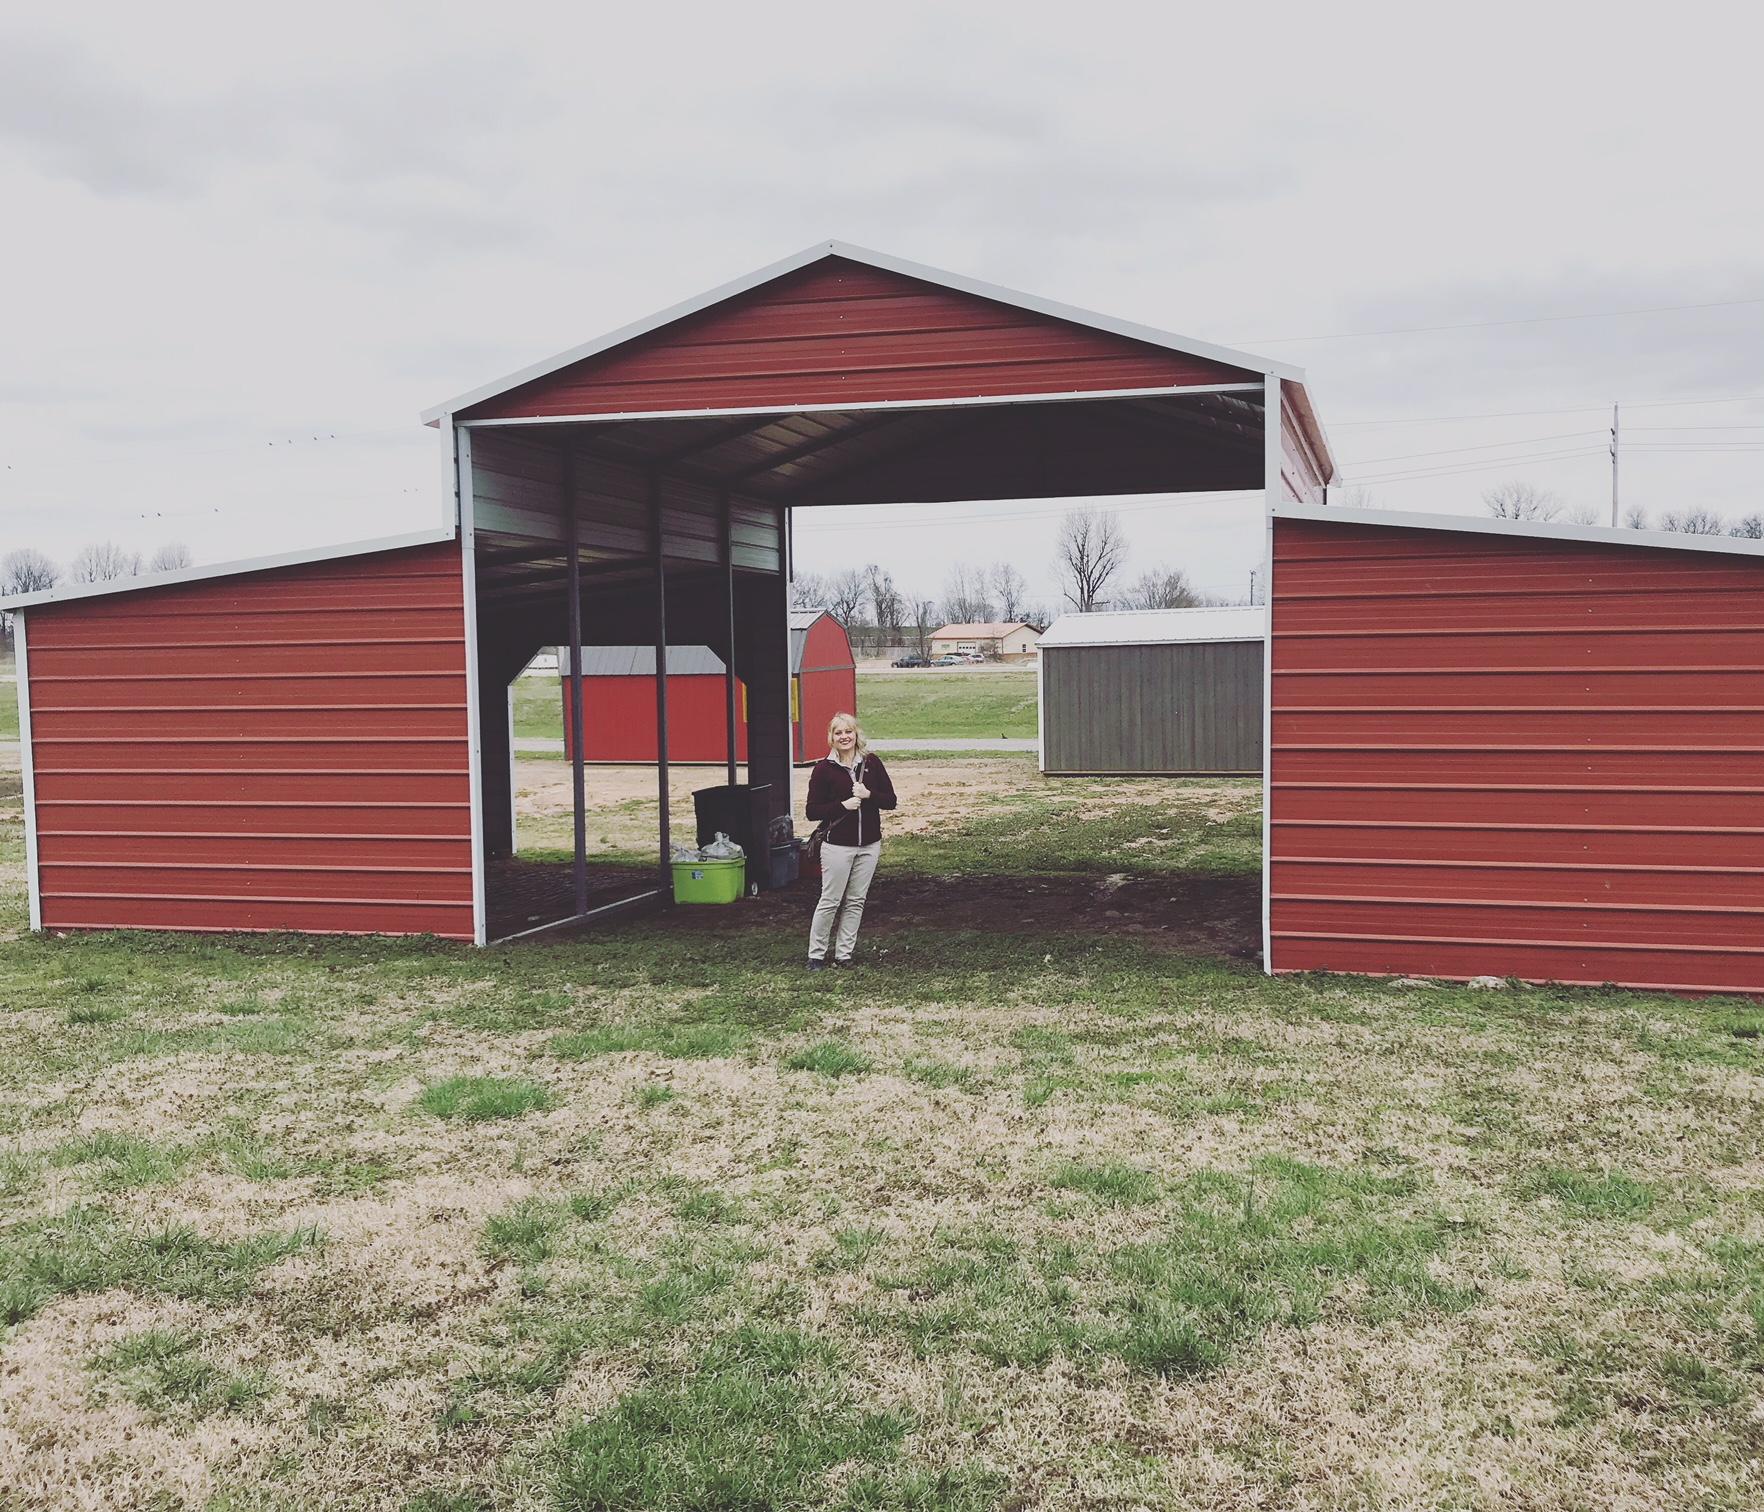
So happy we finally found a barn that would work! Photo by Wayne DeLisle
Normally $8500 brand new, Wayne made a cash offer of less than half of that for the demo model on-site that had been there for over eight years. It had room for two 10′ x 12′ stalls on one side and a 10′ x 12′ stall and tack room on the other with ample space in the aisleway. It needed some modifications, but Wayne is super handy and is OFFICIALLY the best horse husband ever, and promised he could turn this into my dream barn. So on a sunny Saturday morning, we tore that thing down in less than four hours (I was super excited thinking it would go up at the same speed — I was wrong) and I had a barn.
To prepare for the barn’s arrival, Wayne leveled out the patch of ground where I wanted it to be placed and we set a base of two inch minus gravel covered by two layers of chat so that the barn was level and we weren’t setting it on dirt floors. We extended the gravel layer to the turnout area in front of the barn so I had a small space to let the horses out and about if the fields were too muddy for full turnout.

Wayne preparing the ground so we could assemble the barn. Photo by Meagan DeLisle
The front and back had a large opening (made for an RV to fit under) that we opted to close in; both sides on the face had arched openings, one of which had a garage door mounted on it. Wayne ordered extra tin and some metal posts that made up the current frame and modified the barn to where the back was completely closed, aside from the garage door opening that he relocated to allow for me to open the barn up to the field if I desired. He also placed the other archway on the front and when winter nears we intend on either building a sliding barn door or getting another garage door so I can close it up if needed. The final touch was a cute little window in the side where my tack room would be because Wayne wanted me to be able to look out and see my horses *sigh — he is lovely*.

Finally taking shape. Photo by Meagan DeLisle
If you think modifying an existing structure is easy, you are partly right and partly wrong. It took a lot of work and planning to get everything where it was structurally sound and safe for the horses, but Wayne is a miracle man and made it happen. We tied the barn down with multiple ground anchors throughout and the structure was done.
The outside was just one half of the project. Then we had to organize the inside of the barn itself. Check back in on Horse Nation for part two to see how we build our stalls in panels for easy take-down, our DIY money saving tips and more!

Leave a Comment