


SmartPak Monday Morning Feed: 7 Steps to Sidesaddle Success
SmartPak’s own Dr. Lydia Gray tried something new in 2018: riding sidesaddle! Here’s an excerpt from her post on the SmartPak blog with her steps to success.
Almost a year ago, I set out on a journey to learn how to ride sidesaddle, as my horse gets bored quickly and thrives on new challenges (as long as the question is more mental than physical). If he were a human, he would enjoy a Rubik’s Cube, sudoku puzzles, or a smartphone game like Angry Birds. Forget HIIT, Insanity, and CrossFit workouts. Little did I know how intellectually stimulating – as well as physically demanding — riding astride would be for us both!
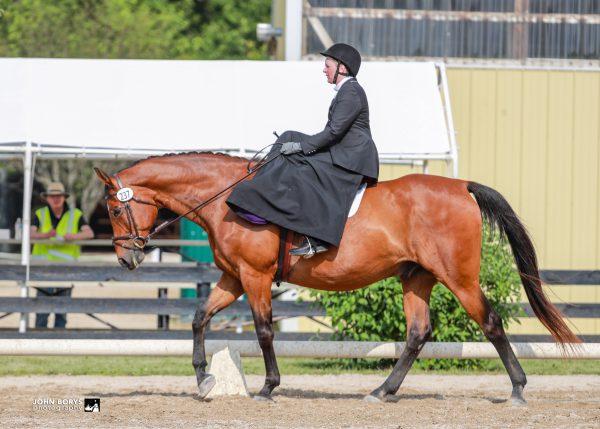
Courtesy of John Borys Photography
Step 1: Find an instructor
Some naturally talented people can just decide one day they’re going to do something and do it. I am not one of those people. So for me to succeed in this new discipline, I knew it was critical to receive professional instruction. Luckily, there was an American Sidesaddle Association-certified instructor right in my area! Diana began coming to my barn in February of 2018 and because she and I are roughly the same size–and our horses are roughly the same size–her personal sidesaddle fit both me and my horse well enough to get started (yes, she has blue hair).

Step 2: Get the proper equipment
A sidesaddle must fit both the rider and the horse impeccably – there’s less “wiggle room” literally and figuratively in an aside saddle vs an astride saddle. With Diana’s help, I made a back tracing (not just a wither tracing) of Newman, transferred it to cardboard, included my measurements, and mailed them to two different reputable sidesaddle consignment shops. Amazingly, one immediately matched it to a 1910 professionally restored Champion & Wilton in her inventory and with just a little bit of reflocking, it fits both of us perfectly!
Step 3: Set your goal and define the steps to achieve it
I used the S.M.A.R.T. acronym to set my goal: Specific, Measurable, Achievable, Results-focused, and Time-bound. It was “Compete at Training Level in a recognized dressage show riding sidesaddle in the spring of 2018.” It may sound easy for a pair who has successfully competed through Third Level and earned a USDF Bronze Medal. But if you read the great article in the October 2018 issue of Dressage Today called “Riding Aside: Shortcuts Forbidden,” Belgian Paralympian Barbara Minneci discussed how sidesaddle requires precise aids and artful skill. Not only do you have to RE-TEACH your horse every single cue, some cues must be different for left side vs right side (e.g. canter). With only my seat and hands (and voice, don’t tell anyone!) as aids, I had to start all over from scratch with Newman:
• Halt to walk
• Walk to halt
• Walk to trot
• Trot to walk
• Canter to trot
• Trot to left lead canter
• Trot to right lead canter
Along with bending and turning, that was pretty much everything we had to figure out for Training Level. Our next goal, First Level, adds these elements:
• Trot to halt
• Halt to trot
• Trot lengthen
• Canter lengthen
• Counter canter left
• Counter canter right
• Leg yield left
• Leg yield right
As my instructor, Diana focused mainly on my seat and posture and let me figure out the “language” with Newman, but she did have this handy tip when we had difficulty with the leg yield left: Use your body as if you still had a right leg on the right side of your horse. By imagining I still had a right leg which engaged my core, hip, and seat bone, this advice not only helped me cause Newman to move sideways left, but also to step deeply into corners and to bend right!
Read the rest of Dr. Gray’s sidesaddle adventure — including her first show results — at the SmartPak blog!

Leave a Comment