


The Return of the Wagon Wheel Wreath
Look, you guys, I’m basically never this put together for the holidays, so I’m going to show this thing off as much as possible.
Seriously, my garage has never looked this “rustic chic.” All photos by Kristen Kovatch.
I’m not entirely sure what it is about the holidays that brings out my inner craft lady, but I suddenly find myself magnetically drawn to the big-box craft store for supplies as I find ways to decorate my home… while keeping that ever-important yet tasteful link to my equestrian passion.
I think I hit the nail right on the head with my latest creation: a Christmas-y iteration of my wagon wheel wreath. I first introduced this thing around Thanksgiving, but if I do say so myself, the Christmas version is pretty rockin’.
Supplies:
- An old wagon wheel
- Wire — I used 19 gauge because it’s what I happened to already have lying around; I would imagine floral wire would work as well but use your judgment here
- Ribbon
- Pine boughs (real or fake)
- Various holiday accoutrements: ornaments, bells, real or fake branches of berries, etc.
1. Acquire wheel.
I went to the local carriage shop which keeps old/broken/otherwise unusable wheels sitting around probably to sell to craft people or folks looking for yard decoration. The wheel I bought was a legitimate Amish buggy wheel, and it weighs quite a bit thanks to the steel rim and center. My helpful husband pointed out after watching me awkwardly slinging this thing around the house that a fake wheel from a hardware store might have been easier… but in my mind, I’d rather have the real deal, no matter how heavy and awkward it is.

Authentic, storied, the real deal!…and super heavy and kind of awkward. Don’t care, it’s still festive.
2. Start by attaching pine boughs.
To achieve that wreathy look, I put the pine boughs on first as my “base.” You can definitely use false branches from the craft store or pick up your own from a Christmas tree farm; they’re often trimming the bottom branches off to get a good trunk for people’s displays. Since I have a grove of pine trees on my own property, I just went out and trimmed some of my own.
You can go all the way around for a true wreath appearance, or go asymetrical or halfway up/down. Anchor with your wire.
3. Layer on your decorations.
I like a natural, classic look (partially because I’ll be too lazy to take this thing down until the end of February, and I want something that’s winter-appropriate and not just Christmas) so I went with two “frosted” branches from the craft store and a bough of fake cranberries. The great thing about the craft store fabrications is that they have wire cores, so you can manipulate these into a round shape to follow the curve of the wheel. Again, use wire. (Pro tip: I recycled all of the wire I had used for the autumn version of this wreath so I didn’t have to cut much more!)
4. Add bow, if desired.
The bow helps cover that awkward “seam” where the ends of the pine branches and decorative boughs meet at the bottom, and ties the whole thing together. (Once again, I recycled the same bow from autumn. Call me cheap; I prefer frugal.)
5. Hang up or display!
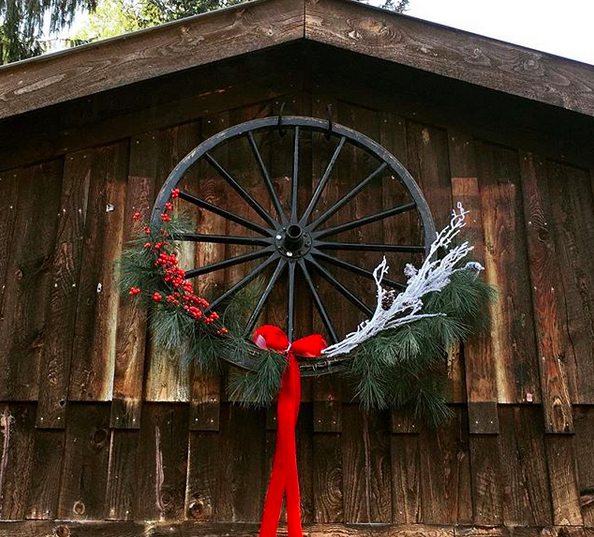
Ta da!
Happy holidays, friends!

Leave a Comment